Sunday, May 20, 2012

Janet's Spinach Pie


Sometimes I just like to make children cry.

Well, that's not true...but what other explanation could there be for someone making SPINACH PIE?

I mean...it's PIE! But there's spinach in it.

Oh, children. I'm so very sorry...but not really.

Because, to grown-ups who like spinach, this pie tastes just a little bit like heaven.

The recipe is from one of my all-time favorite cooking muses: The Barefoot Contessa. This woman is shameless with her use of cheese and butter and things that will kill you fo' sho'. But, oh, what a way to go!

In the past, I followed her recipe to make individual spinach pies, kind of like little pockets of spinach goodness. But Thursday was such an insane day, I barely had time to dump the filling into four pie plates (one for each Better Halves family), pull the puff pastry dough over the whole mess, and throw it in the oven.

And you know what? I kind of liked this version better!

Finally, if you're busy like me and don't care about whether or not you burn down your house, just throw these pies in the oven while you run out to deal with your over-scheduled life. Ask your backdoor neighbor to watch for flames shooting out of your kitchen windows, and make sure you're back within the hour to take the (perfectly baked!) pies out of the oven. (whew!)

Now, here's that recipe:

Ingredients

  • 3 cups chopped yellow onions (2 onions) (Um, NO. I left that foolishness OUT. -Don't. like. onions.)
  • 2 tablespoons good olive oil (Yes, please!)
  • 2 teaspoons kosher salt (I actually used about half of this. Too much dang salt, Ina Garten.)
  • 1 1/2 teaspoons freshly ground black pepper
  • 3 (10-ounce) packages frozen chopped spinach, defrosted
  • 6 extra-large eggs, beaten
  • 2 teaspoons grated nutmeg
  • 1/2 cup freshly grated Parmesan cheese
  • 3 tablespoons plain dry bread crumbs
  • 1/2 pound good feta, cut into 1/2-inch cubes
  • 1/2 cup pignoli (pine nuts)
  • 1/4 pound butter, melted
  • 6 sheets phyllo dough, defrosted (NO. I just used puff pastry. Seems way easier to me. Maybe not so authentic, but I don't care. I'm looking for easy, baby. Easy!)

Directions

Preheat the oven to 375 degrees.

In a medium saute pan on medium heat, saute the onions with the olive oil until translucent and slightly browned, 10 to 15 minutes. Add the salt and pepper and allow to cool slightly. (Onion haters say NO.)


Squeeze out and discard as much of the liquid from the spinach as possible. Put the spinach into a bowl and then gently mix in the onions, eggs, nutmeg, Parmesan cheese, bread crumbs, feta, and pignoli.


Butter an ovenproof, nonstick, 8-inch saute pan and line it with 6 stacked sheets of phyllo dough, brushing each with melted butter and letting the edges hang over the pan. (Use puff pastry and skip all of that "brush with butter" business and get to the pie-eating that much faster.)

(Roll out your puff pastry on a flour-dusted surface so that it's large enough to cover a pie plate with plenty extra hanging off the sides.) Pour the spinach mixture into the middle of the phyllo (puff pastry) and neatly (or not-so neatly) fold the edges up and over the top to seal in the filling. Brush the top well with melted butter (and sprinkle a little shredded parmesan on just for pretty!). Bake for 1 hour, until the top is golden brown and the filling is set. Remove from the oven and allow to cool completely. Serve at room temperature.

Serve it up and watch the children cry.

But it is SOOO good, you will be able to block out the sounds of their tears with the sounds of your own "Yum! Yum! YUM!"

(Serve with pita and hummus so the kids don't starve to death...)


Wednesday, May 9, 2012

The Disappearing BLT


Okay, so I know that I made the BLT and you aren't supposed to rave about food that you create, but ... I LOVE this sandwich. It is my mom's creation, so I take no credit for this little twist on the oh-so familiar sandwich.

The most daunting task about making a BLT for 18 is frying the bacon! The last time I made this, I think I spent multiple hours standing in front of a frying pan. My sister recently shared with me that she makes bacon for her husband and five children on the electric griddle. BRILLIANT! I never thought about this time-saving method of frying the bacon. Hands down...REAL bacon is fried...not microwaved or cooked in the oven.

So...here was my first time preparing bacon on the griddle...


It was a success. Much less of a mess and the cooking process was a lot faster!

As for the tomatoes, I don't just slice the tomatoes. A while back, my mom told me what she'd made for dinner for herself and my dad: a huge BLT! But what really made it was the tomatoes! She took some grape tomatoes, threw them on the stove with olive oil and minced garlic AND let them cook away. Let them cook on med-low heat for a while...they will burst and create a lovely sauce/spread for the BLT.


What else...

My only other "secret" was making the bread. I guess I could have done this by scratch but I didn't! I just grabbed some frozen bread dough from the freezer section of the local grocery store and let it rise.


In the past, I have gone to the local pizzeria and purchased their fresh bread dough...just another idea. Making your own loaves allows for a much thinner bread, allowing your to enjoy the insides of the sandwich more!

That's about it...assemble the sandwiches with some mayo. YUM, YUM.

Okay...easy dinner, right? So...who's going to add it to their menus?

Saturday, May 5, 2012

Baked Ricotta Rigatoni


This recipe came from Rachael Ray! Apparently, many people enjoyed this recipe this week. Here was the post from The Rachael Ray Show yesterday...


Check out Rach's most popular #recipe of the week! http://bit.ly/KingOZ

bit.ly
"My spring-inspired update of a family favorite." - Rachael

 ·  · follow @RachaelRayShow · 17 hours ago via


I did make a few alterations to our meal this week.

1. I didn't use San Marzano Tomatoes. My mom has told me that they are truly the best BUT anyone who knows me knows that I am WAY too frugal to buy San Marzano Tomatoes. They were triple other brands!! Sorry ladies but I will not spend that much on you all!!

2. I did not add the thyme or the mint. Not sure what it would have done to the taste but I wasn't willing to experiment. I am not great with herbs.

3. AND as much as I wanted to buy fresh mozzarella (I LOVE IT), I just couldn't do it! So much cheaper to just buy the shredded mozzarella. I am sure that making this switch to the fresh would have made it SOOOO much tastier! If I was making ONE, I would have used it. Making FOUR required the use of the cheap stuff!!

4. I didn't use any spring peas. I wouldn't want to ruin it for the kiddos. My kids questioned what the green parsley was...peas would have put them over the top!

All in all, it was delicious! The lemon zest was a must! I don't recommend taking that ingredient out. I didn't measure, I just started zesting!

I would highly encourage you to make this meal apart of your menu in the coming weeks!! It is a nice twist on the traditional ziti!

Friday, May 4, 2012

Janet's Ikea Swedish Meatball Dinner


Swedish Meatballs at Ikea. Is there anything better?

No, there is not.


Unless we're talking about homemade Ikea Meatballs you can enjoy without the prospect of loading a bunch of unassembled furniture into the trunk of your car.

And certainly if you don't live anywhere near an Ikea, well, you've got to get your meatball fix somehow. So let's begin!

First: Click HERE for a link to a recipe for the meatballs and the gravy (ohhhhh, the gravy! the glorious, glorious GRAVY!). 

Second: Make meatballs and the gravy. Don't skimp on the cream.

{Meatballs Ready for the Oven}
Instead of frying them, I bake at 400
for 20 minutes on a cookie sheet with a rack.


Third: Take it to the HNL ('hole 'nutha level) by making my favorite, non-Ikea mashed potatoes (see below). Again, don't skimp on the dairy.


Next: Make a quick salad so that you feel slightly less shame about the other items on the plate. Add a plop of Lingonberry Jelly (or, if you're like me and you don't have any: Red Currant Jelly from the local grocery store. No one will know the difference).

Finally: Eat. Eat. Eat. Eat. Eat. (Wear stretchy pants!)


Impossibly Good!


Janet's Ridiculous Mashed Potatoes
{serves 6}

2 lbs potatoes
3/4 tsp salt (1/2 tsp goes in the boiling water; 1/4 tsp is for the potatoes)
3 Tbsp butter, softened
sour cream
cream cheese
1 cup (or less) milk, warmed
pepper

1. Peel and cut potatoes into 2" chunks; place in large sauce pan. Cover with cold water and 1/2 tsp salt. Bring to boil and cook over med heat until potatoes are tender (15-20 min).

2. Drain potatoes and return to pan over low heat. Mash potatoes into pan and blend in butter. Add sour cream and cream cheese when no one is looking. Keep adding until you start to feel shame. Then add a little more (aka, add to taste). Stir in warm milk, stopping when potatoes are a consistency you enjoy.

3. Season potatoes with 1/4 tsp salt (or to taste) and freshly ground pepper. Serve right away (and then save the leftovers for breakfast when the kids aren't around).


Friday, April 27, 2012

Soup in the Pot!


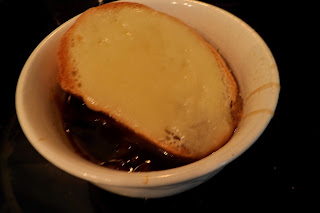
Keri's Crock Pot French Onion Soup


5-6 sweet onions
1 clove of garlic
2 Tbsp butter
14 ounces beef broth
2 tsp Worcestershire sauce
sliced French Bread
sliced or shredded cheese
 
In a large skillet, cook onions and garlic in butter on low heat for about 20 minutes.
 
Transfer onions to crock pot and add beef broth, Worcestershire sauce and 1 cup of water.
 
Cover and cook on low 5-8 hours or high for 2-4 hours.
 
Toast bread slices with cheese on top under broiler for 3-4 minutes.
 
Serve soup in bowls topped with toasted bread.

Thursday, April 26, 2012

What a Crock!

I kid! I kid! 

(But, seriously, who could resist a title like that during the Great Crockpot Challenge of 2012?)


As Krista explained, the Crockpot Challenge was started primarily as a way to initiate me (Janet) into the wonderful world of slow cookers. Up until now, I've only ever used my crock pot to make BBQ pork (ala my dad's incredible recipe, which I will share with you some time this summer when I will certainly have a craving for barbecue--it's so stinkin' good!)

So, what was the verdict, you ask. Yeah, I know you're sitting on the edge of your seat, biting your nails in eager anticipation to know...

Well, if I'm being 100% honest here, my verdict is: "Meh."

Wednesday, April 25, 2012

Krista's Crockpot Baked Potatoes and Fixin's


April's Crockpot Challenge! 

(...And my mom's homemade roll recipe)

So...someone came up with this brilliant idea to have a Crockpot Challenge. (Okay, it was me!)

Well, it seemed like a good idea...

My whole point behind it was to get Janet to use a crockpot. Keri, Amy and I use crockpot meals every once in a while, and I have professed to Janet how WONDERFUL it is to do a crockpot meal.

Whenever I make one, I simply get everyone's crockpot in the morning, throw everything in it, and send it back to them to them to plug in and cook. (I would imagine that plugging four crockpots in for a day would somehow effect my electric bill!!) Anyway...on crockpot nights, dinner is done and it is not even lunch time!

Janet, being the incredible cook that she is, has never tried it. (TONIGHT is the night for her!)

Back to Monday night, my night. Over the weekend, I just couldn't come up with an idea I wanted to try.
I looked on all the recipe websites, and nothing was looking appealing...I was not in the mood for pot roast!! I came across many recipes on making baked potatoes in the crockpot.


Sounded easy...clean, poke holes, cover in foil and THROW IN CROCKPOT! Perfect.

So I cleaned the potatoes, poked holes, covered them in oil and some salt and wrapped them in foil. Then, I filled my crockpot...and, I believe this is where I messed up. Most of the recipes didn't indicate how many potatoes to put in.

At 4:15, I was starting to panic when the potatoes were as still hard as rocks. UH-NO!
Quickly, I turned the oven on and started transferring them.

The final verdict on the crockpot cooked baked potatoes: Not great. I do think that they started cooking in the crockpot because once I threw them in the oven, they were done quickly, BUT on a whole, it was a failure!

On a more positive note, I want to share my mom's roll recipe recipe with you. It is so easy and so yummy! (A few weeks ago, I made a salad for The Better Halves and used these rolls to make the croutons! They were a couple days old and made for the perfect croutons.)


Mom's Homemade Roll Recipe


1 cup of warm water between 105 and 115 degrees
2 packages of active dry yeast
1 stick of melted butter
½ c sugar
3 eggs
1 t salt
4 ½ cups of flour

Yields: 2 dozen

Combine water and yeast in large water and let mixture stand until yeast is foamy … 5 minutes
Mix in butter, sugar, eggs, salt on slow speed.
Beat in flour one cup at a time until dough is too stiff to mix.
Cover and refrigerator for 2 hours or up to 4 days.
Grease a 13x9 baking pan. Turn chilled dough out on lightly floured surface.
Divide dough in 24 equal pieces.  Roll each piece into smooth round ball. Place in even rows in pan…4 across.


Cover and allow balls to rise to double size…1 hour.
Preheat oven 375. Bake until rolls are golden brown…15-20 minutes. 


ENJOY!